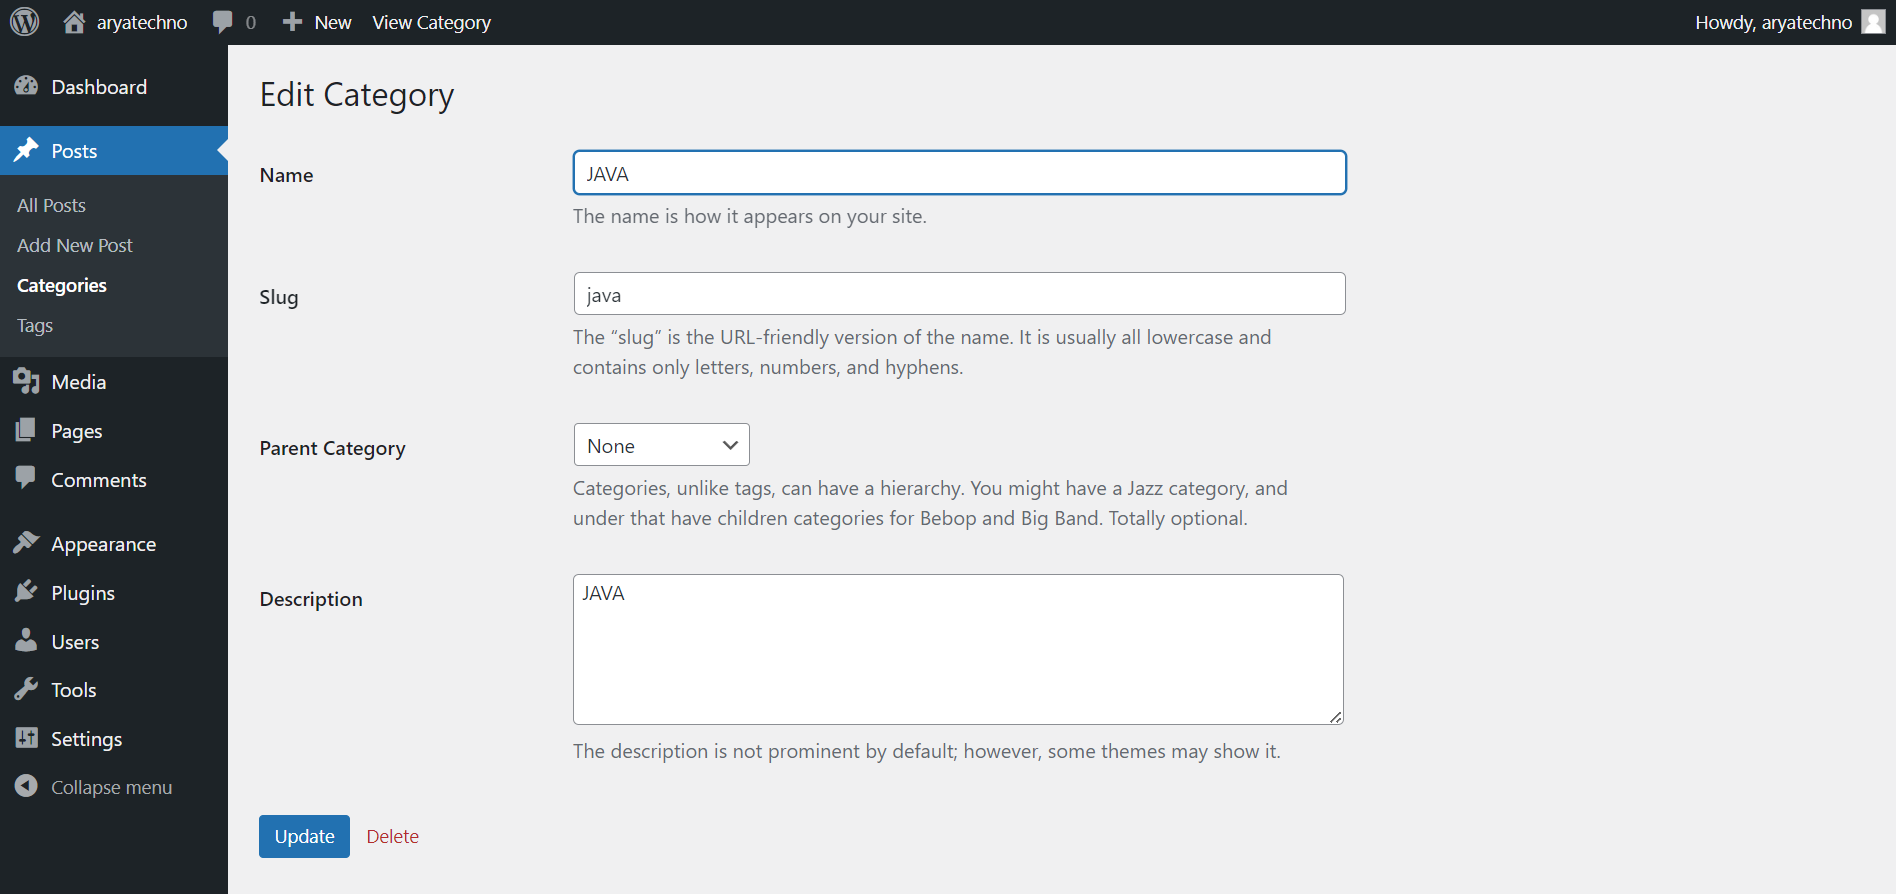
Editing a category in WordPress is a straightforward process. Here are the steps:
-
Login to your WordPress Dashboard:
- Open your web browser and go to the login page of your WordPress site.
- Enter your username and password to log in.
-
Access the Categories Section:
- In the WordPress Dashboard, find and click on "Posts" in the left sidebar.
- From the expanded menu, click on "Categories."
-
Locate the Category to Edit:
- On the Categories page, you'll see a list of existing categories.
- Hover over the category you want to edit, and you'll see options like "Edit" and "Delete."
-
Edit the Category:
- Click on the "Edit" link below the category name.
- You will be taken to the Edit Category screen, where you can make changes to the category name, slug, or parent category (if applicable).
- Modify the necessary fields.
-
Save Changes:
- After making your changes, click the "Update" button to save the edited category.
-
Confirmation:
- Once you've successfully updated the category, you should see a confirmation message.
Now, the changes you made to the category will be reflected throughout your site. If you have posts assigned to this category, they will now reflect the updated category name.
Remember that changes to category names or slugs can impact the URLs of category archives. If your site's permalink structure includes category names, updating them may affect the URLs of the posts under that category.


Comments