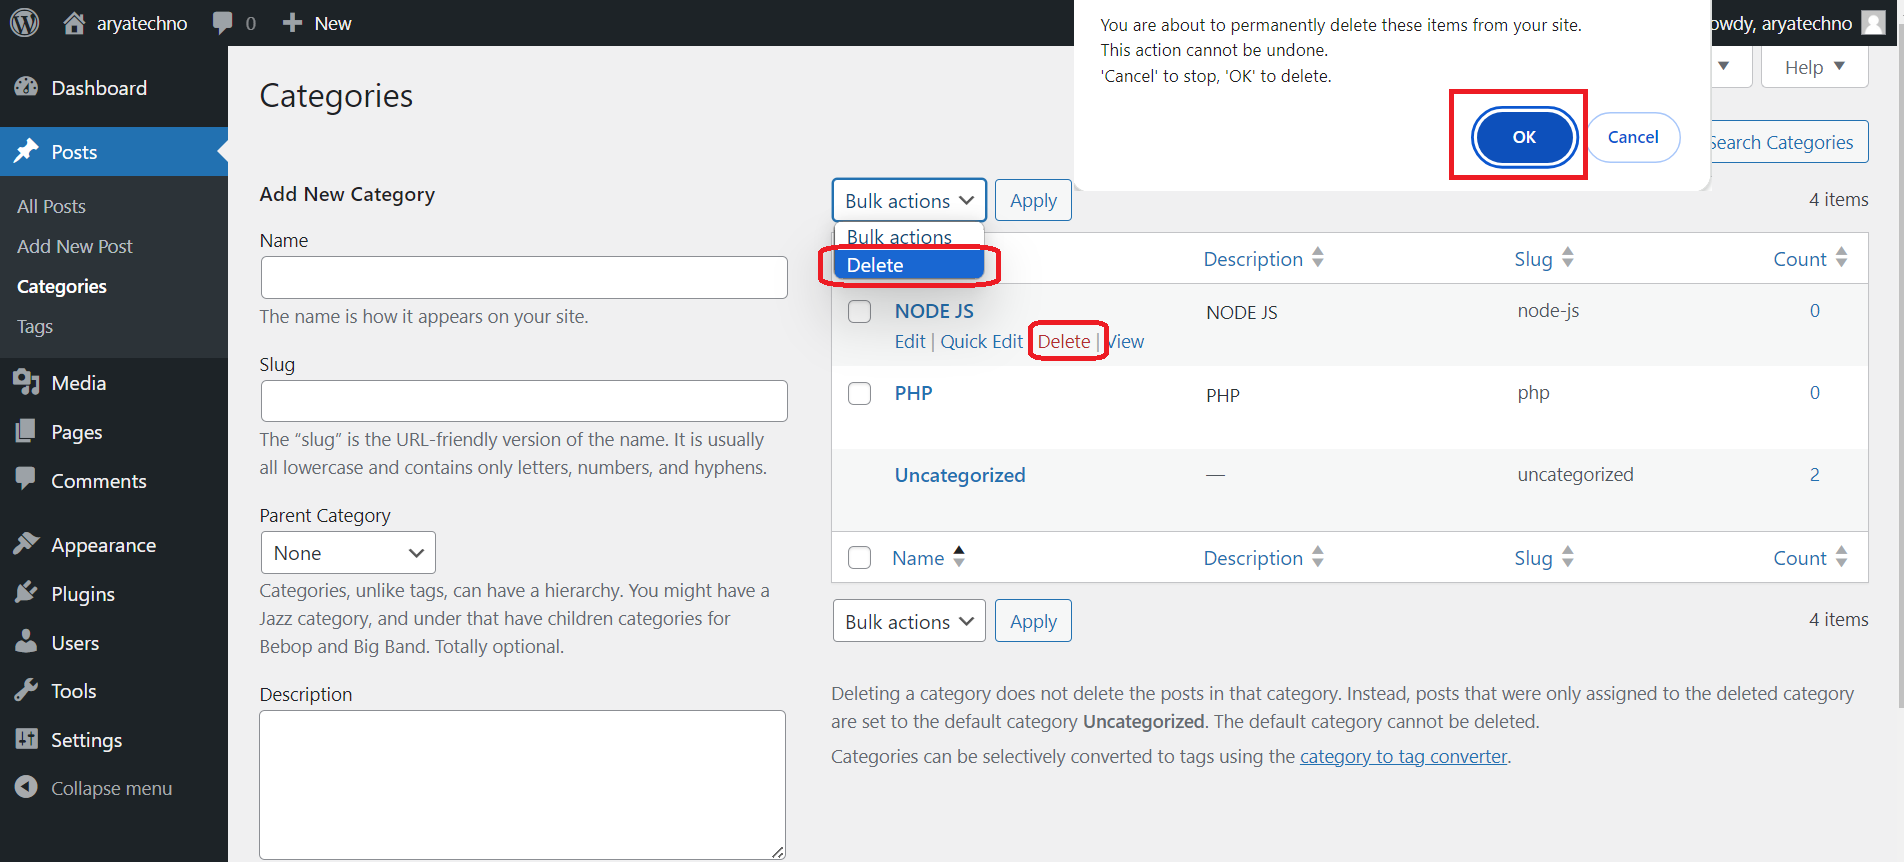
Deleting a category in WordPress is a straightforward process. However, before you delete a category, it's important to note that deleting a category doesn't delete the posts within it. Instead, those posts become uncategorized. If you want to reassign the posts to a different category, you should do so before deleting the category. Here are the steps to delete a category:
-
Login to your WordPress Dashboard:
- Open your web browser and go to the login page of your WordPress site.
- Enter your username and password to log in.
-
Access the Categories Section:
- In the WordPress Dashboard, find and click on "Posts" in the left sidebar.
- From the expanded menu, click on "Categories."
-
Locate the Category to Delete:
- On the Categories page, you'll see a list of existing categories.
- Hover over the category you want to delete, and you'll see options like "Edit" and "Delete."
-
Delete the Category:
- Click on the "Delete" link below the category name.
- WordPress will ask for confirmation. It will also inform you that deleting a category does not delete the posts assigned to it but rather assigns them to the default category (usually "Uncategorized").
-
Confirm Deletion:
- Confirm that you want to delete the category.
-
Update Posts (Optional):
- If you want to reassign the posts to a different category, you can go to the "Posts" section, select the posts previously in the deleted category, and use the "Bulk Actions" dropdown to assign a new category.
-
Confirmation:
- Once the category is deleted, you should see a confirmation message.
Always be cautious when deleting categories, especially if your site has been live for a while, as changes to categories can impact the structure and navigation of your site. Consider whether reassigning posts to a different category or creating a new category would better suit your content organization.


Comments