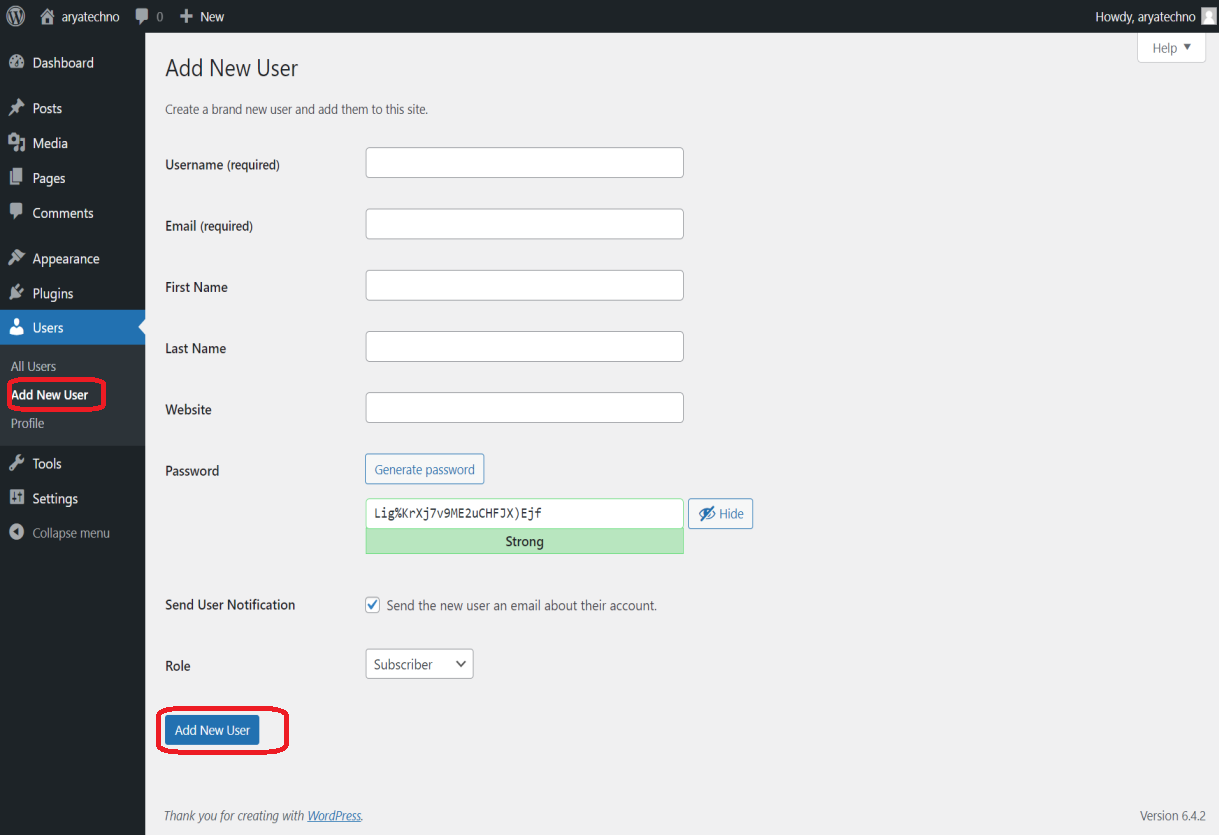
Adding users in WordPress is a common task, especially if you want to allow multiple individuals to contribute to or manage your site. Here's a step-by-step guide on how to add users in WordPress:
Adding a New User:
-
Login to your WordPress Dashboard:
- Open your web browser and navigate to the login page of your WordPress site.
- Enter your username and password to log in.
-
Access the Users Section:
- In the left sidebar, find and click on "Users."
-
Click on "Add New":
- Once you're in the Users section, click the "Add New" button at the top.
-
Enter User Details:
- Fill in the required information for the new user. This typically includes:
- Username: The user's login name.
- Email: The user's email address.
- First Name: The user's first name.
- Last Name: The user's last name.
- Password: You can either choose a strong password or use the "Show Password" button to generate one. Make sure to share this password securely with the user.
- Fill in the required information for the new user. This typically includes:
-
User Role:
- Assign a role to the user using the "Role" dropdown. Choose from roles such as Administrator, Editor, Author, Contributor, or Subscriber based on the user's responsibilities. The role determines the user's capabilities on the site.
-
Send User Notification:
- You can check the box to send the new user an email notification about their account.
-
Click "Add New User":
- Click the "Add New User" button to create the new user account.


Comments